
Mi Lugarcito
React & Node.js - 고객 추가 양식 구현 & 이벤트 핸들링 본문
서버와의 통신 목적의 라이브러리 설치하기

cd client
npm install --save axios
CustomerAdd.js
//고객추가 양식 만들기
//서버와의 통신 목적의 라이브러리 설치하기
import React from 'react';
import {post} from 'axios';

class CustomerAdd extends React.Component{
    constructor(props){
        super(props);
        //모든 변수 초기화해주기
        this.state={
            file:null,
            userName:'',
            birthday:'',
            gender:'',
            job:'',
            fileName:''
        }
    }
    //함수 만들어야한다. 총 3가지
    handleFormSubmit = (e) =>{
        e.preventDefault()
        this.addCustomer()
            .then ((response) => {
                console.log(response.data);
            })
    }

    handleFileChange =(e) =>{//file[0]이게 아니라 files[0] 이거임@@@
        this.setState({
            file:e.target.files[0],
            fileName:e.target.value
        })
    }

    handleValueChange=(e)=>{
        let nextState ={};
        nextState[e.target.name] = e.target.value;
        this.setState(nextState);
    }


    addCustomer =() =>{
        const url ='/api/customers';
        const formData = new FormData();
        formData.append('image', this.state.file);
        formData.append('name', this.state.userName);
        formData.append('birthday', this.state.birthday);
        formData.append('gender', this.state.gender);
        formData.append('job', this.state.job);
        const config ={
            headers:{
                'content-type': 'multipart/form-data'
            }
        }

        return post(url, formData, config);//환경설정 :  config ---> 이렇게 3개의 요소를 headers에 맞추어서 실제 서버로 데이터 보내도록 하는 기능
    }

    render(){
        return(
            <form onSubmit={this.handleFormSubmit}>
                <h1>고객추가</h1>
                프로필 이미지 : <input type="file" name="file" file={this.state.file} value={this.state.fileName} onChange={this.handleFileChange}/><br/>
                이름 : <input type="text" name="userName" value={this.state.userName} onChange={this.handleValueChange}/><br/>
                생년월일 : <input type="text" name="birthday" value={this.state.birthday} onChange={this.handleValueChange}/><br/>
                성별 : <input type="text" name="gender" value={this.state.gender} onChange={this.handleValueChange}/><br/>
                직업 : <input type="text" name="job" value={this.state.job} onChange={this.handleValueChange}/><br/>
                <button type="submit">추가하기</button>
            </form>
        )
    }
}

export default CustomerAdd;
App.js
import logo from './logo.svg';
import './App.css';
import { Component } from 'react';
import Customer from './components/Customer';
//고객추가양식
import CustomerAdd from './components/CustomerAdd';
import Paper from '@material-ui/core/Paper';
import Table from '@material-ui/core/Table';
import TableHead from '@material-ui/core/TableHead';
import TableBody from '@material-ui/core/TableBody';
import TableRow from '@material-ui/core/TableRow';
import TableCell from '@material-ui/core/TableCell';
//프로그래스바 라이브러리 추가하기
import CircularProgress from  '@material-ui/core/CircularProgress';


//cs적용하기
import {ThemeProvider, withStyles} from '@material-ui/core/styles';

const styles=theme=>({
  root:{
    width:"100%",
    //marginTop:ThemeProvider.spacing.unit*3,
    overflowX:"auto"
  },
  table:{//이후 가로스크롤바가 생김
    minWidth:1080
  },
  //프로그래스바
  progress: {
    margin:theme.spacing(2)
  }
});


/*
리액트의 component life cycle을 가지고 있다.
1) constructor()
2) componentWillMount()
3) render()
4) componentDidMount()
// props or state => 변경되는 경우에는 shouldComponentUpdate()함수가 사용되어서 실질적으로 다시 render 함수 불러와서 뷰 갱신한다.
*/


//고객정보를 서버에 접속해서 가져올 수 있도록 해야한다. (데이터가 변경될 수 있음)
//props는 변경될 수 없는 데이터를 명시할때 사용 & state 는 변경될 수 있는 데이터를 명시할 때 사용한다.
class App extends Component{

  state={
    customers : "",
    //프로그래스바
    completed : 0 //퍼센트를 알려주는것
  }

  //실제 api 서버에 접근하도록 하기 (componentDidMount : 데이터 받아오는 작업)
  componentDidMount(){
    //프로그래스 바
    this.timer=setInterval(this.progress, 20); //0.02초마다 한번씩 프로그래스 함수 실행되도록 설정
    //컴포넌트 준비 완료
    this.callApi()
      .then(res => this.setState({customers:res}))
      .catch(err => console.log(err));
  }

  //api 불러오기 (비동기적 수행)
  //const : 변수
  callApi = async() =>{
    const response = await fetch('/api/customers');//로컬호스트 접근
    const body = await response.json();
    return body;
  }


  //프로그래스 애니매이션 효과
  progress =() => {
    const {completed} =this.state;
    this.setState({completed:completed >=100 ? 0 : completed +1});
  }


  render(){
    const {classes} =this.props;
    return(
      <div>
        <Paper className={classes.root}>
            <Table className={classes.table}>
              <TableHead>
                <TableRow>
                  <TableCell>번호</TableCell>
                  <TableCell>이미지</TableCell>
                  <TableCell>이름</TableCell>
                  <TableCell>생년월일</TableCell>
                  <TableCell>성별</TableCell>
                  <TableCell>직업</TableCell>
                </TableRow>
              </TableHead>

              <TableBody>
                  {this.state.customers ? this.state.customers.map(c=>{
                    return (<Customer key={c.id} id={c.id} image={c.image} name={c.name} birthday={c.birthday} gender={c.gender} job={c.job} />);
                  }) :
                  <TableRow>
                    <TableCell colSpan="6" align="center">
                      <CircularProgress className={classes.progress} variant="determinate" value={this.state.completed}/>
                    </TableCell>
                  </TableRow>
                  }
              </TableBody>
            </Table>
        </Paper>
        <CustomerAdd/>
      </div>

    );
  }
}

export default withStyles(styles)(App);

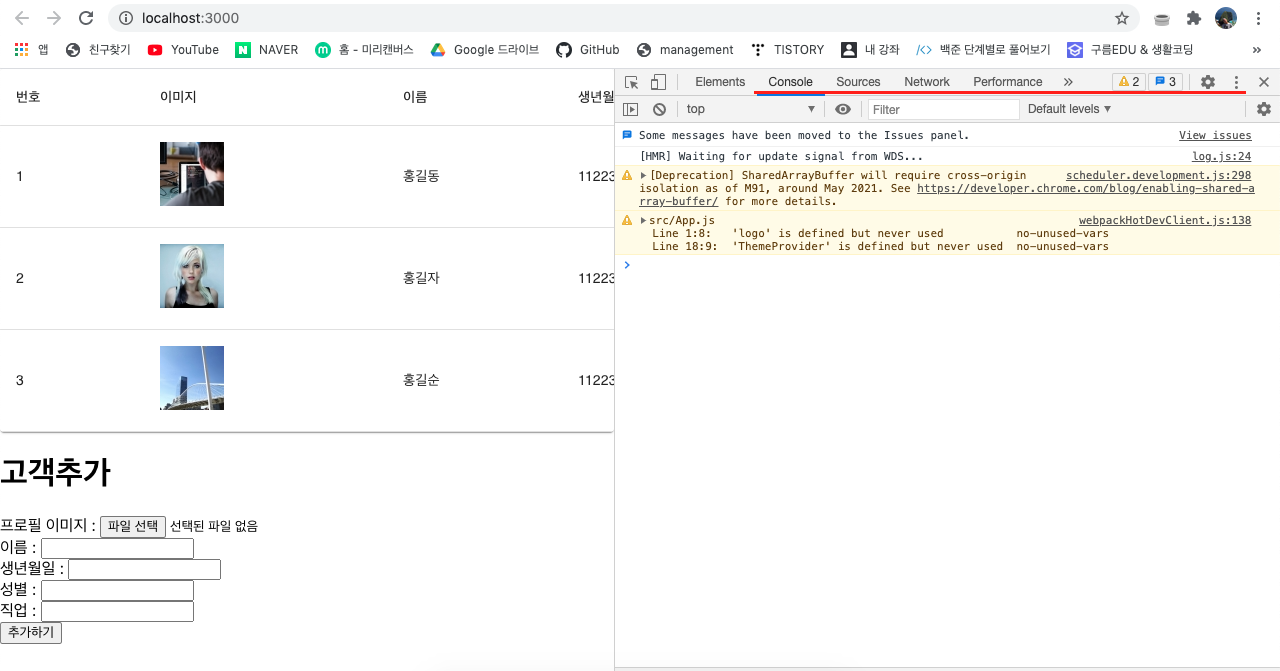


위의 사진과 같이 클라이언트 -> 서버로 데이터가 성공적으로 전달이 되었다.
'React & Next.js' 카테고리의 다른 글
'React & Next.js' Related Articles
more


