
Mi Lugarcito
React & Node.js - Node.js Express에서 REST API 구축하기 [React와 Node.js를 활용한 고객 관리 시스템 개발 강의] + react scripts 버전 확인하는 방법 본문
React & Node.js - Node.js Express에서 REST API 구축하기 [React와 Node.js를 활용한 고객 관리 시스템 개발 강의] + react scripts 버전 확인하는 방법
selene park 2021. 3. 11. 16:29
vscode terminal 에서
yarn dev// 명령어 입력후 클라이언트 창과 서버창 동시에 실행이 되는지 확인하기
yarn dev 명령실행하니 localhost:3000이 자동 실행되었다. (client & server 동시 동작한다@@)


**express 에서 REST API 직접 구현하는 예제 (고객 목록을 알려주는 하나의 rest api 개발예정)
먼저, 기존의 서버 모듈에 전체 고객 목록을 불러오는 api 를 구현 먼저 해야한다.
server.js (res,send() 가 아니라 res.send() 이다@@@@)
const express =require('express');
const bodyParser = require('body-parser');
const app =express();
const port = process.env.port || 5000;

app.use(bodyParser.json());//기본적으로 REST API 에서는 데이터 주고받을때 json 데이터 형식으로 주고받음
app.use(bodyParser.urlencoded({extended:true}));

// app.get('/api/hello', (req, res) => {
//     res.send({message:'hello express!'});
// });

//client가 /api/customers 경로로 접속을 하게되면 3명의 고객정보 데이터를 담고있는 배열 데이터를 json 형태로 반환할 수 있도록 하기
app.get('/api/customers', (req,res) => {
    res, send([
        {
          'id':1,
          'image' : 'https://placeimg.com/64/64/1',
          'name' : '박은실',
          'birthday' : '941122',
          'gender' : '여자',
          'job' : '취준생'
        },
        {
          'id':2,
          'image' : 'https://placeimg.com/64/64/2',
          'name' : '홍길동',
          'birthday' : '941122',
          'gender' : '여자',
          'job' : '취준생'
        },
        {
          'id':3,
          'image' : 'https://placeimg.com/64/64/3',
          'name' : '이순신',
          'birthday' : '941122',
          'gender' : '여자',
          'job' : '취준생'
        }
      ]);
});//client에게 데이터를 반환 할 수 있도록 하기


app.listen(port, ()=> console.log(`listening on port ${port}`));
package.json
{
    "name": "managemnet",
    "version": "1.0.0",
    "scripts": {
        "client": "cd client && yarn start",
        "server": "nodemon server.js",
        "dev": "concurrently --kill-others-on-fail \"yarn server\" \"yarn client\""
    },
    "dependencies": {
        "body-parser": "^1.18.3",
        "express": "^4.16.4",
        "yarn": "^1.13.0"
    },
    "devDependencies": {
        "concurrently": "^4.0.1"
    }
}

localhost:5000/api/customers 들어가니 저렇게 send is not defined 에러메시지와 함께 데이터가 출력되지 않았다.
오류 메시지를 보니 send 부분에서 코딩을 잘 못 한것같아 찾아보니 dot 을 찍지않고 컴마를 찍어서 에러가 발생함.
(res, send) 가 아니라 (res. send)
이렇게 하니 데이터형식이 잘 출력되는것을 알 수 있다.
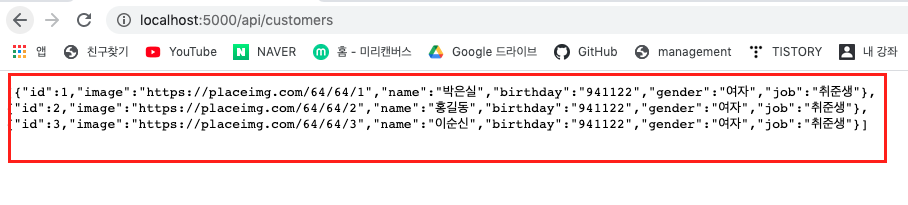
server.js
const express =require('express');
const bodyParser = require('body-parser');
const app =express();
const port = process.env.port || 5000;

app.use(bodyParser.json());//기본적으로 REST API 에서는 데이터 주고받을때 json 데이터 형식으로 주고받음
app.use(bodyParser.urlencoded({extended:true}));

app.get('/api/customers', (req,res) => {
    res.send([
        {
          'id':1,
          'image' : 'https://placeimg.com/64/64/1',
          'name' : '박은실',
          'birthday' : '941122',
          'gender' : '여자',
          'job' : '취준생'
        },
        {
          'id':2,
          'image' : 'https://placeimg.com/64/64/2',
          'name' : '홍길동',
          'birthday' : '941122',
          'gender' : '여자',
          'job' : '취준생'
        },
        {
          'id':3,
          'image' : 'https://placeimg.com/64/64/3',
          'name' : '이순신',
          'birthday' : '941122',
          'gender' : '여자',
          'job' : '취준생'
        }
      ]);
});


app.listen(port, ()=> console.log(`listening on port ${port}`));
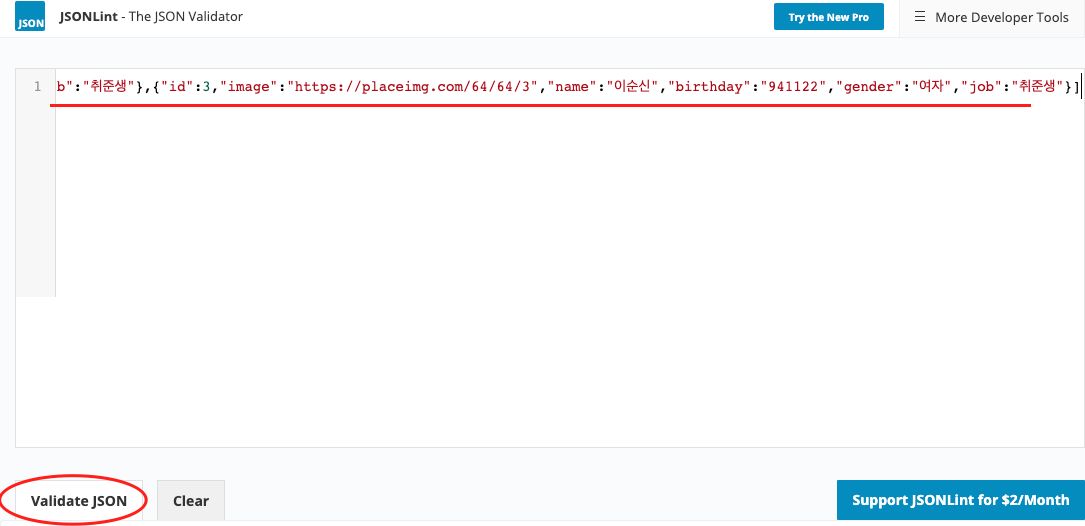
실제 서버 접속했을때 api 서버가 출력해준 데이터가 올바른 json 형식인지 확인해주는 서비스
The JSON Validator
JSONLint is the free online validator and reformatter tool for JSON, a lightweight data-interchange format.
jsonlint.com
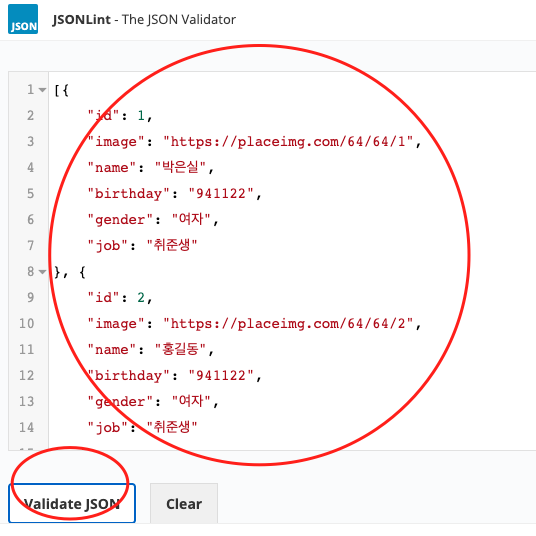
이렇게 위처럼 json 형식으로 데이터를 잘 나타내준다!!

일반적으로 react에서는 비동기 통신으로 서버에 접근하여 데이터를 가져오도록 코딩한다.
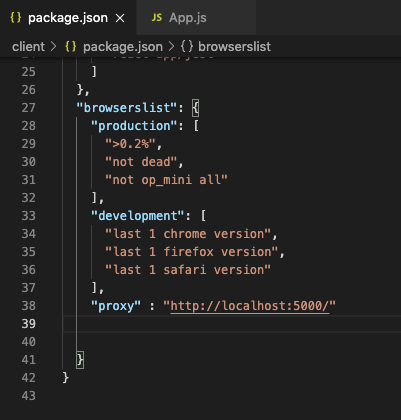
5000 포트를 api 서버로 이용하기 위해서 client 의 package.json 에 추가적으로 명시하기 (프록시 설정하기)
"proxy" : "http://localhost:5000/"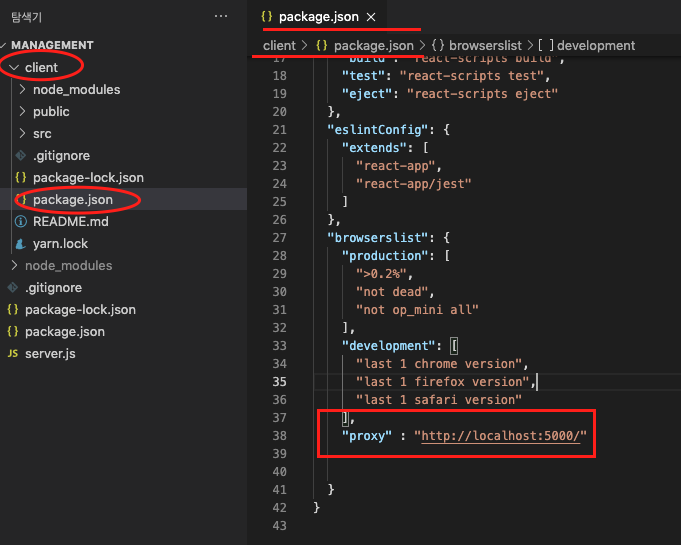
app.js
import logo from './logo.svg';
import './App.css';
import { Component } from 'react';
import Customer from './components/Customer';
import Paper from '@material-ui/core/Paper';
import Table from '@material-ui/core/Table';
import TableHead from '@material-ui/core/TableHead';
import TableBody from '@material-ui/core/TableBody';
import TableRow from '@material-ui/core/TableRow';
import TableCell from '@material-ui/core/TableCell';
//cs적용하기
import {ThemeProvider, withStyles} from '@material-ui/core/styles';

const styles=theme=>({
  root:{
    width:"100%",
    //marginTop:ThemeProvider.spacing.unit*3,
    overflowX:"auto"
  },
  table:{//이후 가로스크롤바가 생김
    minWidth:1080
  }
})

//고객정보를 서버에 접속해서 가져올 수 있도록 해야한다. (데이터가 변경될 수 있음)
//props는 변경될 수 없는 데이터를 명시할때 사용 & state 는 변경될 수 있는 데이터를 명시할 때 사용한다.
class App extends Component{

  state={
    customers: ""
  }

  //실제 api 서버에 접근하도록 하기 (componentDidMount : 데이터 받아오는 작업)
  componentDidMount(){
    //컴포넌트 준비 완료
    this.callApi()
    .then(res => this.setState({customers:res}))
    .catch(err => console.log(err));
  }

  //api 불러오기 (비동기적 수행)
  //const : 변수
  callApi = async() =>{
    const response = await fetch('/api/customers');//로컬호스트 접근
    const body = await response.json();
    return body;
  }


  render(){
    const {classes} =this.props;
    return(
        <Paper className={classes.root}>
            <Table className={classes.table}>
              <TableHead>
                <TableRow>
                  <TableCell>번호</TableCell>
                  <TableCell>이미지</TableCell>
                  <TableCell>이름</TableCell>
                  <TableCell>생년월일</TableCell>
                  <TableCell>성별</TableCell>
                  <TableCell>직업</TableCell>
                </TableRow>
              </TableHead>

              <TableBody>
                  {this.state.customers ? this.state.customers.map(c=>{
                    return (<Customer key={c.id} id={c.id} image={c.image} name={c.name} birthday={c.birthday} gender={c.gender} job={c.job} />);
                  }) : ""}
              </TableBody>
            </Table>
        </Paper>

    );
  }
}

export default withStyles(styles)(App);
이렇게 까지하면 아까 하던것과 같이 창이 떠야하는데 고객정보를 가져오지 못하는것을 알 수 있다.


공백문자가 포함되어 있어서 경고메시지 출력함
일반적으로 warning이라고 떠있으면 실제 동작 자체에는 큰 영향을 미치진 않지만 어떤 오류인지 알 수 없어서 network 를 살펴봐야함
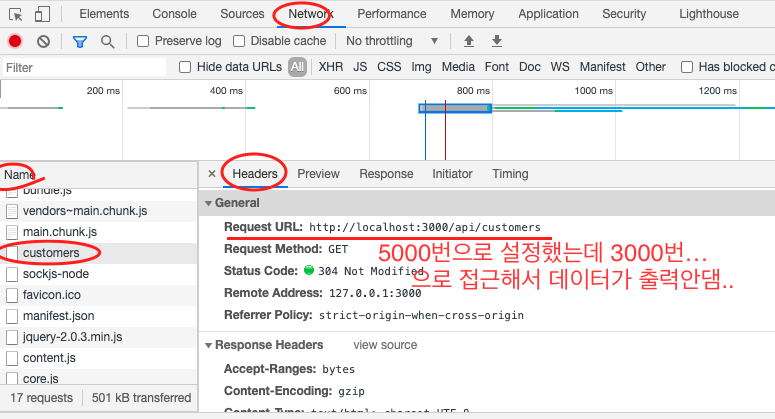
5000번으로 잘 되어있으니 이럴때는 서버 껐다가 yarn dev로 서버 재 실행 해주기!!
근데 이렇게 해도 데이터를 못가져와서...구글링 해보니
react-scripts version 이 2이상인 경우 프록시 설정을 다르게 해줘야 한다고 함.

github.com/Mactto/Customer-Management-System
Mactto/Customer-Management-System
[React + Node] 고객 관리 시스템. Contribute to Mactto/Customer-Management-System development by creating an account on GitHub.
github.com
chaewonkong.github.io/posts/express-with-react.html
Express 서버와 React: Proxy 활용과 빌드 및 헤로쿠(Heroku) 배포
Dev 환경에서 Proxy를 이용해 Express 서버와 Create-React-App 서버를 함께 돌리는 방법을 살펴본다. 이후 빌드(Build)를 하고 Heroku에 해당 앱을 배포하는 과정에 대해 알아본다.
chaewonkong.github.io
프록시(Proxy) 설정하기
react-scripts의 버전이 2 이상인 경우 http-proxy-middleware를 설치해 setupProxy.js라는 파일을 통해 proxy 설정을 해줘야 한다.
react-scripts 버전이 2 이상인 경우
yarn add http-proxy-middleware // 설치먼저 해주기client/src에 setupProxy.js라는 파일을 생성, 다음 코드를 입력하고 저장한다.
const proxy = require("http-proxy-middleware");

module.exports = function(app) {
  app.use(proxy("/api", { target: "http://localhost:5000" }));
};
그리고, http-proxy-middleware를 사용하는 경우 client/package.json에는 proxy 설정이 있으면 안 된다.
처음에 작성했던 코드 “proxy”:”http://localhost:5000” 삭제해주기

이후, ctrl + c 해서 서버중지후 다시 서버 재 접속해주기 (그래도 안뜬다면 여러번 서버 재접속 시도 해보면 나오더라)


여전히 에러 메시지는 출력되는데 이유는 잘 모르겟따...

여기서 request url 에서는 3000번으로 출력되지만,
실제로는 proxy 설정에 의해서 5000포트에 접근해서 데이터를 받아오는 것이라고 한다.
'React & Next.js' 카테고리의 다른 글
| React & Node.js - 고객(Customer) DB 테이블 구축 및 Express와 연동하기 [React와 Node.js를 활용한 고객 관리 시스템 개발 강의] (0) | 2021.03.12 |
|---|---|
| React의 라이프 사이클 이해 및 API 로딩 처리 구현하기 [React와 Node.js를 활용한 고객 관리 시스템 개발 강의] (0) | 2021.03.12 |
| React & Node.js - Node.js Express 서버 개발환경 구축하기 (0) | 2021.03.11 |
| React & Node.js - 고객관리시스템 개발하기, Material UI 디자인 적용하기 (0) | 2021.03.11 |
| React & Node.js - 고객관리시스템 개발하기2 (0) | 2021.03.11 |


