
Mi Lugarcito
React & Node.js - 고객관리시스템 개발하기, Material UI 디자인 적용하기 본문
material-ui.com/getting-started/installation/
Installation - Material-UI
Install Material-UI, the world's most popular React UI framework.
material-ui.com
//vscode terminal 에서 설치하기

npm install @material-ui/core
yarn start
material-ui.com/components/tables/
React Table component - Material-UI
Tables display sets of data. They can be fully customized.
material-ui.com
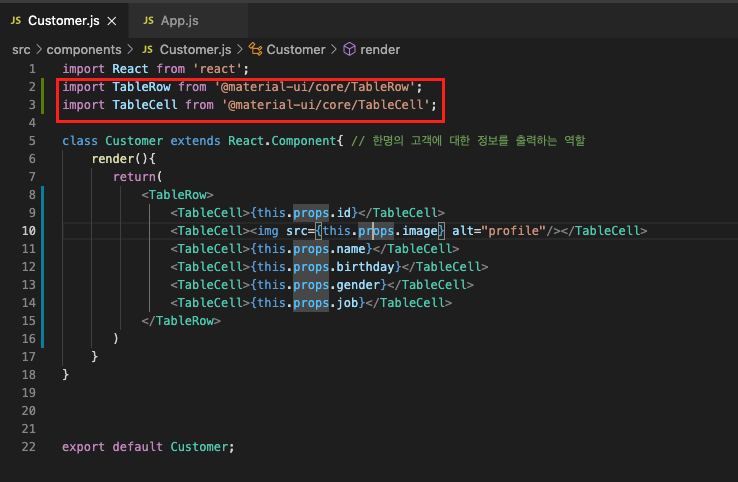
Customer.js
import React from 'react';
import TableRow from '@material-ui/core/TableRow';
import TableCell from '@material-ui/core/TableCell';
class Customer extends React.Component{ // 한명의 고객에 대한 정보를 출력하는 역할
render(){
return(
<TableRow>
<TableCell>{this.props.id}</TableCell>
<TableCell><img src={this.props.image} alt="profile"/></TableCell>
<TableCell>{this.props.name}</TableCell>
<TableCell>{this.props.birthday}</TableCell>
<TableCell>{this.props.gender}</TableCell>
<TableCell>{this.props.job}</TableCell>
</TableRow>
)
}
}
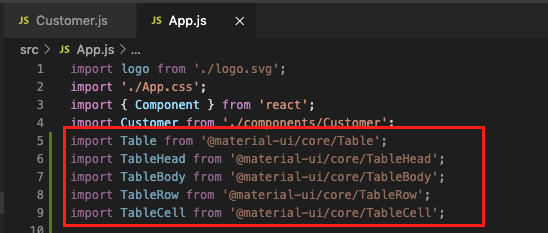
export default Customer;App.js
import logo from './logo.svg';
import './App.css';
import { Component } from 'react';
import Customer from './components/Customer';
import Table from '@material-ui/core/Table';
import TableHead from '@material-ui/core/TableHead';
import TableBody from '@material-ui/core/TableBody';
import TableRow from '@material-ui/core/TableRow';
import TableCell from '@material-ui/core/TableCell';
//실제로 보내고자 하는 데이터 명시하기
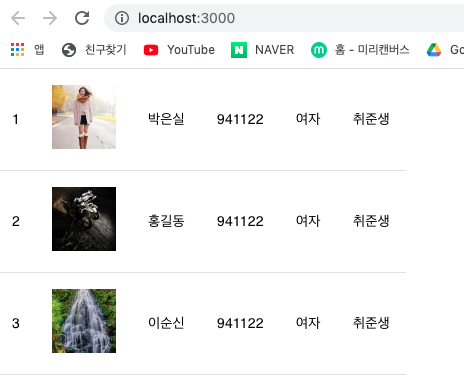
const customers =[
{
'id':1,
'image' : 'https://placeimg.com/64/64/1',
'name' : '박은실',
'birthday' : '941122',
'gender' : '여자',
'job' : '취준생'
},
{
'id':2,
'image' : 'https://placeimg.com/64/64/2',
'name' : '홍길동',
'birthday' : '941122',
'gender' : '여자',
'job' : '취준생'
},
{
'id':3,
'image' : 'https://placeimg.com/64/64/3',
'name' : '이순신',
'birthday' : '941122',
'gender' : '여자',
'job' : '취준생'
}
]
class App extends Component{
render(){
return(
<div>
<Table>
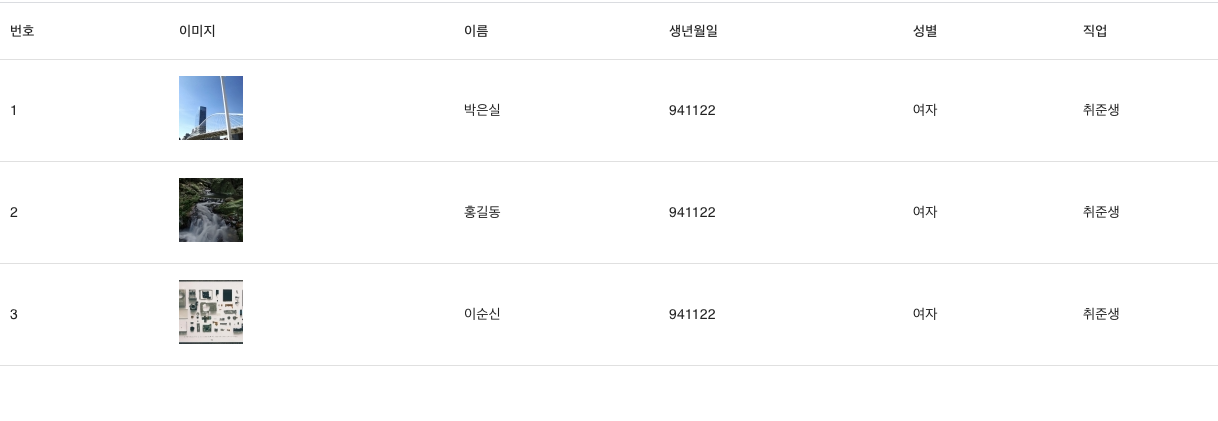
<TableHead>
<TableRow>
<TableCell>번호</TableCell>
<TableCell>이미지</TableCell>
<TableCell>이름</TableCell>
<TableCell>생년월일</TableCell>
<TableCell>성별</TableCell>
<TableCell>직업</TableCell>
</TableRow>
</TableHead>
<TableBody>
{customers.map(c=>{ return (<Customer key={c.id} id={c.id} image={c.image} name={c.name} birthday={c.birthday} gender={c.gender} job={c.job} />); })}
</TableBody>
</Table>
</div>
);
}
}
export default App;
app.js (가로 스크롤바 생기게 하기)
import logo from './logo.svg';
import './App.css';
import { Component } from 'react';
import Customer from './components/Customer';
import Paper from '@material-ui/core/Paper';
import Table from '@material-ui/core/Table';
import TableHead from '@material-ui/core/TableHead';
import TableBody from '@material-ui/core/TableBody';
import TableRow from '@material-ui/core/TableRow';
import TableCell from '@material-ui/core/TableCell';
//cs적용하기
import {ThemeProvider, withStyles} from '@material-ui/core/styles';

const styles=theme=>({
  root:{
    width:"100%",
    //marginTop:ThemeProvider.spacing.unit*3,
    overflowX:"auto"
  },
  table:{//이후 가로스크롤바가 생김
    minWidth:1080
  }
})


//실제로 보내고자 하는 데이터 명시하기
const customers =[
  {
    'id':1,
    'image' : 'https://placeimg.com/64/64/1',
    'name' : '박은실',
    'birthday' : '941122',
    'gender' : '여자',
    'job' : '취준생'
  },
  {
    'id':2,
    'image' : 'https://placeimg.com/64/64/2',
    'name' : '홍길동',
    'birthday' : '941122',
    'gender' : '여자',
    'job' : '취준생'
  },
  {
    'id':3,
    'image' : 'https://placeimg.com/64/64/3',
    'name' : '이순신',
    'birthday' : '941122',
    'gender' : '여자',
    'job' : '취준생'
  }
]

class App extends Component{
  render(){
    const {classes} =this.props;
    return(
        <Paper className={classes.root}>
            <Table className={classes.table}>
              <TableHead>
                <TableRow>
                  <TableCell>번호</TableCell>
                  <TableCell>이미지</TableCell>
                  <TableCell>이름</TableCell>
                  <TableCell>생년월일</TableCell>
                  <TableCell>성별</TableCell>
                  <TableCell>직업</TableCell>
                </TableRow>
              </TableHead>

              <TableBody>
                  {customers.map(c=>{ return (<Customer key={c.id} id={c.id} image={c.image} name={c.name} birthday={c.birthday} gender={c.gender} job={c.job} />); })}
              </TableBody>
            </Table>
        </Paper>

    );
  }
}

export default withStyles(styles)(App);
'React & Next.js' 카테고리의 다른 글
| React의 라이프 사이클 이해 및 API 로딩 처리 구현하기 [React와 Node.js를 활용한 고객 관리 시스템 개발 강의] (0) | 2021.03.12 |
|---|---|
| React & Node.js - Node.js Express에서 REST API 구축하기 [React와 Node.js를 활용한 고객 관리 시스템 개발 강의] + react scripts 버전 확인하는 방법 (0) | 2021.03.11 |
| React & Node.js - Node.js Express 서버 개발환경 구축하기 (0) | 2021.03.11 |
| React & Node.js - 고객관리시스템 개발하기2 (0) | 2021.03.11 |
| React & Node.js - 고객관리시스템 개발하기1 + git 관리하기 (0) | 2021.03.10 |
'React & Next.js' Related Articles
more


