
Mi Lugarcito
React - Setting & Movie App 만들기 완료 본문
npx create-react-app 생성할 폴더이름1. readme 안에 내용 지우기
2. yarn.dock 파일 삭제
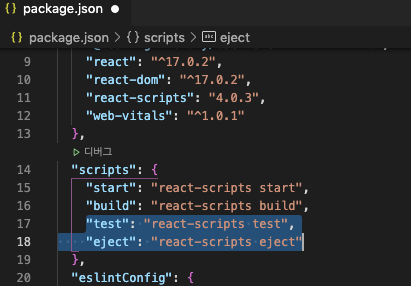
3. package.json 에서 블럭 된 2개 삭제
git init
git remote add origin https://github.com/dmstlf292/movie_app_2021.git
git add .
git commit -m "setting"
git push origin master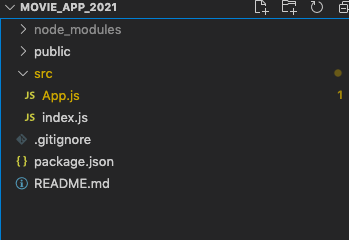
App.js
import React from 'react';

function App() {
  return (
    <div className="App"></div>
  );
}

export default App;
index.js
import React from 'react';
import ReactDOM from 'react-dom';
import App from './App';

ReactDOM.render(
  <React.StrictMode>
    <App />
  </React.StrictMode>,
  document.getElementById('root')
);
React start!!
npm start
npm i prop-types//prop이 잘 전달됐는지 확인하기 위해서
npm i
JSX & PROPS
import React from 'react';
import PropTypes from "prop-types";


const foodILike=[
  {
    id:1,
    name:"aaa",
    image:11,
    rating:5
  },
  {
    id:2,
    name:"bbb",
    image:12,
    rating:4
  },
  {
    id:3,
    name:"ccc",
    image:13,
    rating:3
  },
  {
    id:4,
    name:"ddd",
    image:14,
    rating:2
  },
  {
    id:5,
    name:"eee",
    image:15,
    rating:1
  },
]


function Food({name, image, rating}){
  return (
  <div>
    <h1>me gusta {name}</h1>
    <h3>tengo {image}</h3>
    <h4>rate / {rating}</h4>
    {/* <img src={} alt={name}/> */}
  </div>
  )
}


Food.PropTypes={
  name:PropTypes.string.isRequired,
  picture:PropTypes.string.isRequired,
  rating:PropTypes.string.isRequired
}


function App() {
  return (
    <div>
      {foodILike.map(dish =>  (
        <Food
        key={dish.id}
        name={dish.name}
        image ={dish.image} rating={dish.rating}/>
      ))}
    </div>
  );
}

export default App;
STATE1
app.js
import React from 'react';

//state 호출시 리액트는 항상 새로 render 한다.(새로운 state -> setState(필수) ->새로운 render)
//but setState를 호출햇을때만 위의 설명 같이 동작함!!!
class App extends React.Component{
  //호출 순서 : constructor 호출 -> render() -> componentDidMount() 호출
  //Updating 순서 : render() -> componentDidUpdate() 호출
  //최종 : setState 호출 -> component 호출 -> render -> componentDidUpdate
  constructor(props){
    super(props);
    console.log("hello");
  }
  state={
    count : 0
  };

  add=()=>{
    this.setState(current =>({count:current.count +1}))
  };
  minus=()=>{
    this.setState(current =>({count:current.count -1}))
  };

  componentDidMount(){
    console.log("component rendered")
  }

  componentDidUpdate(){
    console.log("I just updated")
  }

  //이거는 component 가 떠날때!!만 호출된다. (ex 내가 다른걸 한다던가, 다른 페이지로 갈때...)
  componentWillUnmount(){
    console.log("Goodbye")
  }

  render(){
    console.log("Im rendering now..")
    return (
      <div>
        <h1>The number is :{this.state.count}</h1>
        <button onClick={this.add}>add</button>
        <button onClick={this.minus}>minus</button>
      </div>
    )
  }
}

export default App;
STATE2
app.js
import React from 'react';

class App extends React.Component{

  state={
    isLoading:true
  }

  componentDidMount(){
    setTimeout(()=>{
      this.setState ({isLoading : false})
    },6000)// 6초 후 We are ready
  }

  render(){
    const {isLoading} =this.state;
    return<div>{isLoading ? "Loading" : "We are ready"}</div>;
  }
}

export default App;
STATE3
npm i axiosAPI Documentation - YTS YIFY
Official YTS YIFY API documentation. YTS offers free API - an easy way to access the YIFY movies details.
yts.mx
yts.mx/api/v2/list_movies.json
app.js
import React from 'react';
import axios from 'axios';
class App extends React.Component{
state={
isLoading:true,
movies:[]
}
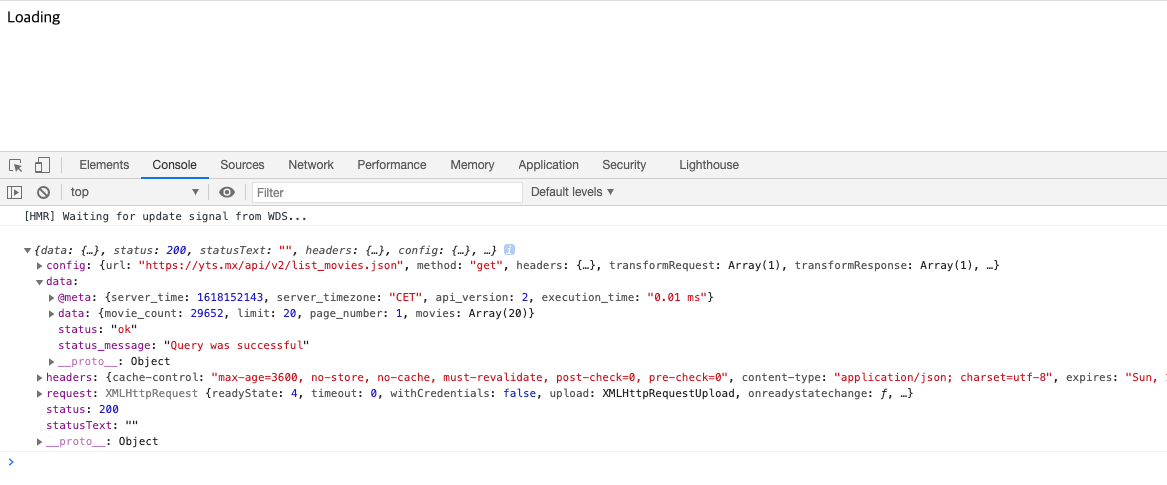
getMovies = async ()=>{//axios가 조금 느려서 데이터 가져올때까지 await 좀 기다려라..
const movies = await axios.get("https://yts.mx/api/v2/list_movies.json");
console.log(movies);
}
componentDidMount(){
this.getMovies();
}
render(){
const {isLoading} =this.state;
return<div>{isLoading ? "Loading" : "We are ready"}</div>;
}
}
export default App;
App.js
import React from 'react';
import axios from 'axios';
import Movie from './Movie';
class App extends React.Component{
state={
isLoading:true,
//이제 여기다 영화 때려넣기..
movies:[]
}
getMovies = async ()=>{//axios가 조금 느려서 데이터 가져올때까지 await 좀 기다려라..
const {data:{data:{movies}}} = await axios.get("https://yts.mx/api/v2/list_movies.json?sort_by=rating");
//console.log(movies);
//this.setState({movies : movies})//state 안에있는 movies : axios의 movie -> 같은이름이라 1개로 줄임
this.setState({movies, isLoading:false})
}
componentDidMount(){
this.getMovies();
}
//render === make
render() {
const { isLoading, movies } = this.state;
//console.log(movie);
//다중커서 alt키 + 커서
return (
<div>
{isLoading
? "Loading..."
//React에서는 요소가 1개뿐이어도 괄호를 꼭 써줘야 한다
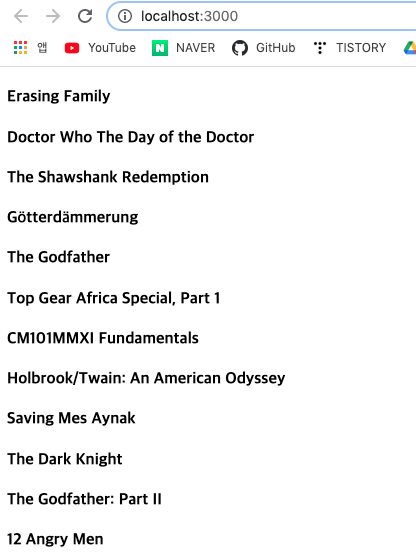
: movies.map(movie => (
<Movie
key={movie.id}
id={movie.id}
year={movie.year}
title={movie.title}
summary={movie.summary}
poster={movie.medium_cover_image}
/>
))}
</div>
);
}
}
export default App;Movie.js
//jsx 파일임! 자바스크립트 + html 파일 합쳐진것!
import React from "react";
import PropTypes from "prop-types";

function Movie({id,year,title,summary,poster}){
    return<h4>{title}</h4>
}

//jsx 에서는 props를 통해서 값을 전달한다.
//key는 표현되지 않지만 필수 props이다.
Movie.prototype={
    id:PropTypes.number.isRequired,
    year:PropTypes.number.isRequired,
    title:PropTypes.string.isRequired,
    summary:PropTypes.string.isRequired,
    poster:PropTypes.string.isRequired
}

export default Movie;[VSCode] 다중 선택 - 커서를 여러개 추가하기
VSCode에서 개발 생산성을 높여주고, 좀 더 편리하게 코드를 수정하는 방법을 알아보고 있습니다. [VSCode] 다중 커서 - 여러줄 선택 하는 2가지 방법 (세로 선택) [VSCode] 다중 선택 - 같은 단어(변수)
hianna.tistory.com
Dribbble - Discover the World’s Top Designers & Creative Professionals
Discover the world’s top designers & creatives Dribbble is the leading destination to find & showcase creative work and home to the world's best design professionals. Sign up
dribbble.com
SoundCloud – Listen to free music and podcasts on SoundCloud
SoundCloud is a music and podcast streaming platform that lets you listen to millions of songs from around the world, or upload your own. Start listening now!
soundcloud.com
App.js
import React from 'react';
import axios from 'axios';
import Movie from './Movie';
import "./App.css";

class App extends React.Component{

  state={
    isLoading:true,
    //이제 여기다 영화 때려넣기..
    movies:[]
  }

  getMovies = async ()=>{//axios가 조금 느려서 데이터 가져올때까지 await 좀 기다려라..
     const {data:{data:{movies}}} = await axios.get("https://yts.mx/api/v2/list_movies.json?sort_by=rating");
     //console.log(movies);
     //this.setState({movies : movies})//state 안에있는 movies : axios의 movie -> 같은이름이라 1개로 줄임
     this.setState({movies, isLoading:false})
  }


  componentDidMount(){
    this.getMovies();
  }

  //render === make
  //render ===> 부모클래스
  //class정의할때 class -> className이라고 해야함. 왜냐면 App.js 에서 쓰는게 class 라서
  render() {
    const { isLoading, movies } = this.state;
  //console.log(movie);
  //다중커서 alt키 + 커서
    return (
      <section className="container">
        {isLoading
          ? (<div className="loader">
              <span className="loader__text">Loading...</span>
          </div>)
          : (
              <div className="movies">
                {movies.map(movie=>(
                  <Movie
                    key={movie.id}
                    id={movie.id}
                    year={movie.year}
                    title={movie.title}
                    summary={movie.summary}
                    poster={movie.medium_cover_image}
                    genres={movie.genres}
                  />
                ))}
              </div>
            )
        }
      </section>
    );
  }
}

export default App;
Movie.js
//jsx 파일임! 자바스크립트 + html 파일 합쳐진것!
//자식, 하위클래스
//map에 있는 각각 아이템은 key가 필요하다. 제공할 key가 없는경우=id가 없는 경우 map에서 item number를 제공해준다. 이름은 아무거나 불러서 써도 상관 없음
import React from "react";
import PropTypes from "prop-types";
import "./Movie.css";

function Movie({year,title,summary,poster, genres}){
    return (
    <div className="movie">
        <img src={poster} alt={title} title={title}/>
        <div className="movie__data">
            <h3 className="movie__title">{title}</h3>
            <h5 className="movie__year">{year}</h5>
            <ul className="genres">
                {genres.map((genre, index)=>
                <li key={index} className="genres__genre">
                    {genre}
                </li>
                )}
            </ul>
            <p className="movie__summary">{summary.slice(0,120)}...</p>

        </div>
    </div>)
}

//jsx 에서는 props를 통해서 값을 전달한다.
//key는 표현되지 않지만 필수 props이다.
Movie.prototype={
    id:PropTypes.number.isRequired,
    year:PropTypes.number.isRequired,
    title:PropTypes.string.isRequired,
    summary:PropTypes.string.isRequired,
    poster:PropTypes.string.isRequired,
    genres:PropTypes.arrayOf(PropTypes.string).isRequired
}

export default Movie;
App.css
* {
    box-sizing: border-box;
  }

  body {
    margin: 0;
    padding: 0;
    font-family: -apple-system, BlinkMacSystemFont, "Segoe UI", Roboto, Oxygen,
      Ubuntu, Cantarell, "Open Sans", "Helvetica Neue", sans-serif;
    background-color: #eff3f7;
    height: 100%;
  }

  html,
  body,
  #potato,
  .container {
    height: 100%;
    display: flex;
    justify-content: center;
  }

  .loader {
    width: 100%;
    height: 100%;
    display: flex;
    justify-content: center;
    align-items: center;
    font-weight: 300;
  }

  .movies {
    display: flex;
    justify-content: space-between;
    align-items: flex-start;
    flex-wrap: wrap;
    padding: 50px;
    padding-top: 70px;
    width: 80%;
  }

  .movies .movie {
    width: 45%;
    background-color: white;
    margin-bottom: 70px;
    display: flex;
    align-items: flex-start;
    justify-content: space-between;
    font-weight: 300;
    padding: 20px;
    border-radius: 5px;
    color: #adaeb9;
    box-shadow: 0 13px 27px -5px rgba(50, 50, 93, 0.25),
      0 8px 16px -8px rgba(0, 0, 0, 0.3), 0 -6px 16px -6px rgba(0, 0, 0, 0.025);
  }

  .movie img {
    position: relative;
    top: -50px;
    max-width: 180px;
    width: 100%;
    margin-right: 30px;
    box-shadow: 0 30px 60px -12px rgba(50, 50, 93, 0.25),
      0 18px 36px -18px rgba(0, 0, 0, 0.3), 0 -12px 36px -8px rgba(0, 0, 0, 0.025);
  }

  .movie .movie__title,
  .movie .movie__year {
    margin: 0;
    font-weight: 300;
  }

  .movie .movie__title {
    margin-bottom: 5px;
    font-size: 24px;
    color: #2c2c2c;
  }

  .movie .movie__genres {
    list-style: none;
    padding: 0;
    margin: 0;
    display: flex;
    margin: 5px 0px;
  }

  .movie__genres li,
  .movie .movie__year {
    margin-right: 10px;
    font-size: 14px;
  }

npm i gh-pages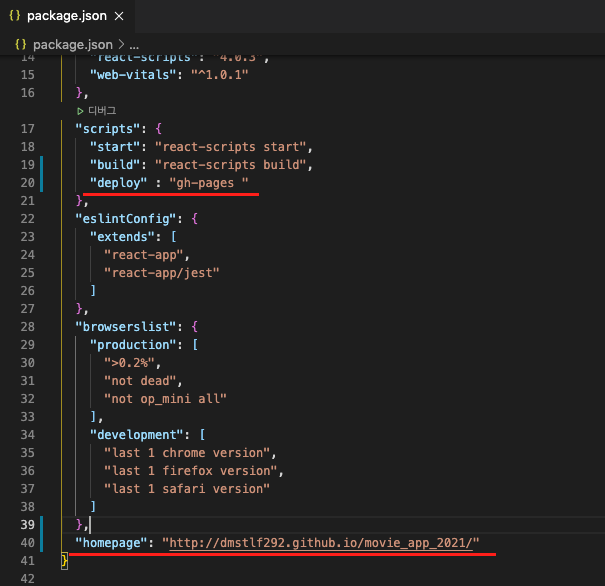
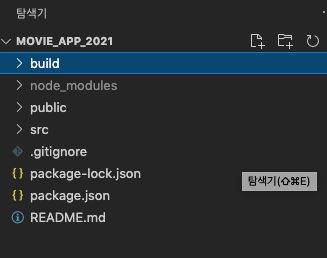
npm run buildbuild 파일이 생긴다.
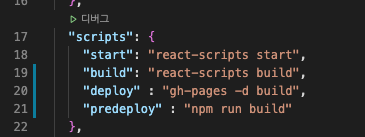
npm run deploy // 이렇게 수정시 항상 실행해줘야 변경된 사항이 업데이트 되어 확인가능함
메뉴 상단바 만들기(Link 와 href 대신 to 사용할것)
react-router-dom
폴더구조
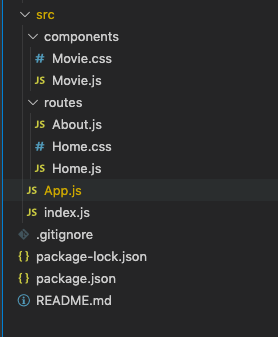
components/Movie.css
  .movies .movie {
    width: 45%;
    background-color: white;
    margin-bottom: 70px;
    display: flex;
    align-items: flex-start;
    justify-content: space-between;
    font-weight: 300;
    padding: 20px;
    border-radius: 5px;
    color: #adaeb9;
    box-shadow: 0 13px 27px -5px rgba(50, 50, 93, 0.25),
      0 8px 16px -8px rgba(0, 0, 0, 0.3), 0 -6px 16px -6px rgba(0, 0, 0, 0.025);
  }

  .movie img {
    position: relative;
    top: -50px;
    max-width: 180px;
    width: 100%;
    margin-right: 30px;
    box-shadow: 0 30px 60px -12px rgba(50, 50, 93, 0.25),
      0 18px 36px -18px rgba(0, 0, 0, 0.3), 0 -12px 36px -8px rgba(0, 0, 0, 0.025);
  }

  .movie .movie__title,
  .movie .movie__year {
    margin: 0;
    font-weight: 300;
  }

  .movie .movie__title {
    margin-bottom: 5px;
    font-size: 24px;
    color: #2c2c2c;
  }

  .movie .movie__genres {
    list-style: none;
    padding: 0;
    margin: 0;
    display: flex;
    margin: 5px 0px;
  }

  .movie__genres li,
  .movie .movie__year {
    margin-right: 10px;
    font-size: 14px;
  }
components/Movie.js
//jsx 파일임! 자바스크립트 + html 파일 합쳐진것!
//자식, 하위클래스
//map에 있는 각각 아이템은 key가 필요하다. 제공할 key가 없는경우=id가 없는 경우 map에서 item number를 제공해준다. 이름은 아무거나 불러서 써도 상관 없음
import React from "react";
import PropTypes from "prop-types";
import "./Movie.css";

function Movie({year,title,summary,poster, genres}){
    return (
    <div className="movie">
        <img src={poster} alt={title} title={title}/>
        <div className="movie__data">
            <h3 className="movie__title">{title}</h3>
            <h5 className="movie__year">{year}</h5>
            <ul className="genres">
                {genres.map((genre, index)=>
                <li key={index} className="genres__genre">
                    {genre}
                </li>
                )}
            </ul>
            <p className="movie__summary">{summary.slice(0,120)}...</p>

        </div>
    </div>)
}

//jsx 에서는 props를 통해서 값을 전달한다.
//key는 표현되지 않지만 필수 props이다.
Movie.prototype={
    id:PropTypes.number.isRequired,
    year:PropTypes.number.isRequired,
    title:PropTypes.string.isRequired,
    summary:PropTypes.string.isRequired,
    poster:PropTypes.string.isRequired,
    genres:PropTypes.arrayOf(PropTypes.string).isRequired
}

export default Movie;
routes/About.js
import React from "react";

function About(){
    return <sapn>This is about page</sapn>
}

export default About;
routes/Homes.css
* {
    box-sizing: border-box;
  }

  body {
    margin: 0;
    padding: 0;
    font-family: -apple-system, BlinkMacSystemFont, "Segoe UI", Roboto, Oxygen,
      Ubuntu, Cantarell, "Open Sans", "Helvetica Neue", sans-serif;
    background-color: #eff3f7;
    height: 100%;
  }

  html,
  body,
  #potato,
  .container {
    height: 100%;
    display: flex;
    justify-content: center;
  }

  .loader {
    width: 100%;
    height: 100%;
    display: flex;
    justify-content: center;
    align-items: center;
    font-weight: 300;
  }

  .movies {
    display: flex;
    justify-content: space-between;
    align-items: flex-start;
    flex-wrap: wrap;
    padding: 50px;
    padding-top: 70px;
    width: 80%;
  }
routes/Home.js
import React from 'react';
import axios from 'axios';
import Movie from '../components/Movie';
import "./Home.css";

class Home extends React.Component{

  state={
    isLoading:true,
    //이제 여기다 영화 때려넣기..
    movies:[]
  }

  getMovies = async ()=>{//axios가 조금 느려서 데이터 가져올때까지 await 좀 기다려라..
     const {data:{data:{movies}}} = await axios.get("https://yts.mx/api/v2/list_movies.json?sort_by=rating");
     //console.log(movies);
     //this.setState({movies : movies})//state 안에있는 movies : axios의 movie -> 같은이름이라 1개로 줄임
     this.setState({movies, isLoading:false})
  }


  componentDidMount(){
    this.getMovies();
  }

  //render === make
  //render ===> 부모클래스
  //class정의할때 class -> className이라고 해야함. 왜냐면 App.js 에서 쓰는게 class 라서
  render() {
    const { isLoading, movies } = this.state;
  //console.log(movie);
  //다중커서 alt키 + 커서
    return (
      <section className="container">
        {isLoading
          ? (<div className="loader">
              <span className="loader__text">Loading...</span>
          </div>)
          : (
              <div className="movies">
                {movies.map(movie=>(
                  <Movie
                    key={movie.id}
                    id={movie.id}
                    year={movie.year}
                    title={movie.title}
                    summary={movie.summary}
                    poster={movie.medium_cover_image}
                    genres={movie.genres}
                  />
                ))}
              </div>
            )
        }
      </section>
    );
  }
}

export default Home;
App.js
import React from "react";
import { HashRouter, Route } from "react-router-dom";
import Home from "./routes/Home";
import About from "./routes/About";

function App() {
  return (
    <HashRouter>
      <Route path="/" exact={true} component={Home} />
      <Route path="/about" component={About} />
    </HashRouter>
  );
}

export default App;
리액트 라우더는 기본적으로 url 을 가져와서 내것의 루트와 비교한다.
루트가 겹치면 그게 뭐든가 간에 공통의 루트에 전부 렌더링 한다. 아래와 같이 할것
<Route path="/" exact={true} component={Home} />
github.com/dmstlf292/movie_app_2021
dmstlf292/movie_app_2021
Contribute to dmstlf292/movie_app_2021 development by creating an account on GitHub.
github.com
'React & Next.js' 카테고리의 다른 글
| React with TypeScript - Slacks //폴더구조 (0) | 2021.04.12 |
|---|---|
| React with TypeScript - Slacks // setting (react, babel, webpack 설정편) (0) | 2021.04.12 |
| React & nest.js - slecks 채팅 만들기 / setting (0) | 2021.03.29 |
| React - 기초용어 정리 (0) | 2021.03.29 |
| React - 이벤트 처리 (0) | 2021.03.29 |


