
Mi Lugarcito
React와 Firebase로 앱 개발하기 - Python 워드 클라우드 API 개발하기 본문
시작전에 먼저 파이썬 설치 후 -> 파이참 설치해야한다.
위키독스
온라인 책을 제작 공유하는 플랫폼 서비스
wikidocs.net
macOS 파이썬 개발환경 Python 3 & 파이참(PyCharm) 설치
맥북이나 iMac에 파이썬 개발환경을 설치해보자. macOS에는 기본적으로 파이썬 2.x 버전이 설치되어 있다. 다음 명령을 실행해보면 기본적으로 설치되어 있는 파이썬 버전을 확인할 수 있다. python -
dev.plusblog.co.kr
위키독스
온라인 책을 제작 공유하는 플랫폼 서비스
wikidocs.net

outputs 폴더 만들기 / word_cloud.py 파일 생성/ NanumGothic.ttf 파일 옮기기


preferences -> project -> python interpreter -> 아래 + 버튼 눌려서
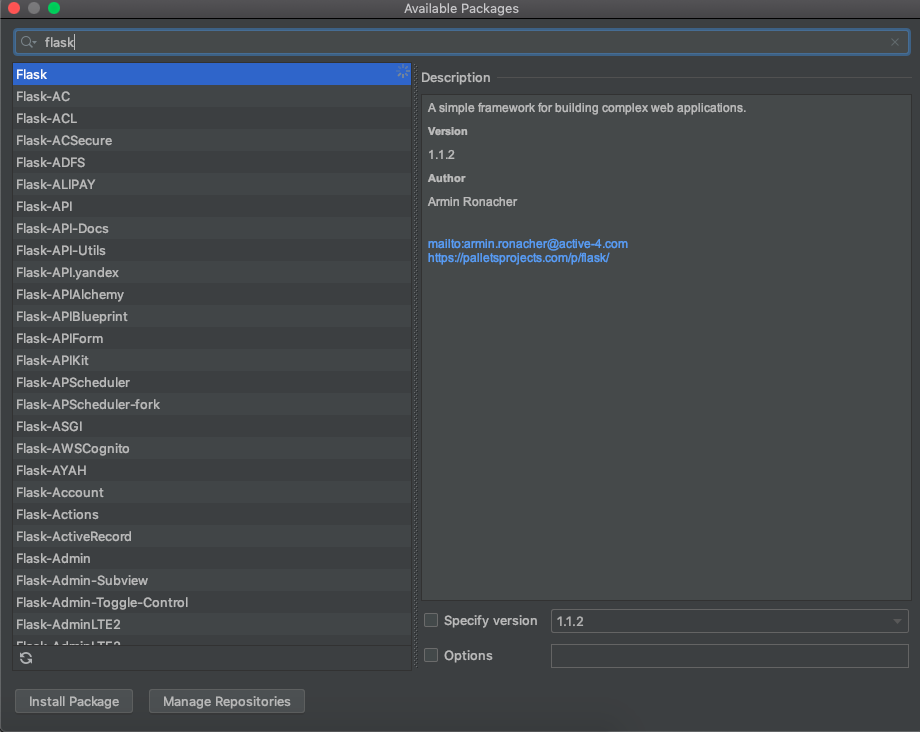
wordcloud / konlpy / matplotlib / flask / flast_cors 5개 라이브러리 다운받기


나눔고딕체 파일 프로젝트폴더에 옮기기


word_cloud.py
# word cloud 에 필요한 라이브러리 불러오기
from wordcloud import WordCloud
# 한국어 자연어 처리 라이브러리 불러오기
from konlpy.tag import Twitter
# 명사의 출현 빈도를 세는 라이브러리 불러오기
from collections import Counter
# 그래프 생성에 필요한 라이브러리 불러오기
import matplotlib.pylab as plt
# api를 제공하기 위해서 flast 웹서버 구축에 필요한 라이브러리 불러오기
from flask import Flask, request, jsonify

# 플라스크 웹 서버 객체 생성하기 (웹서버가 정상적으로 돌아가는지 확인하기 위해서  )
app = Flask(__name__)

@app.route("/process", methods=['GET', 'POST'])
def process():
    content = request.json
    words ={}
    if content['words'] is not None:
        for data in content['words'].values():
            words[data['word']] = data['weight']
    return  jsonify(words)

if __name__ == '__main__':
    app.run('0.0.0.0', port=5000)


정상적으로 웹서버가 구동중인걸 확인할 수 있다.


Talend API Tester - Free Edition
Visually interact with REST, SOAP and HTTP APIs.
chrome.google.com
크롬에서 설치후 실행하기


The JSON Validator
JSONLint is the free online validator and reformatter tool for JSON, a lightweight data-interchange format.
jsonlint.com


{
	"words": {
		"1": {
			"weight": "7",
			"word": "스터디"
		},
		"2": {
			"weight": "5",
			"word": "공부"
		}
	}
}
# word cloud 에 필요한 라이브러리 불러오기
from wordcloud import WordCloud
# 한국어 자연어 처리 라이브러리 불러오기
from konlpy.tag import Twitter
# 명사의 출현 빈도를 세는 라이브러리 불러오기
from collections import Counter
# 그래프 생성에 필요한 라이브러리 불러오기
import matplotlib.pylab as plt
# api를 제공하기 위해서 flast 웹서버 구축에 필요한 라이브러리 불러오기
from flask import Flask, request, jsonify

# 플라스크 웹 서버 객체 생성하기 (웹서버가 정상적으로 돌아가는지 확인하기 위해서  )
app = Flask(__name__)

# 폰트 경로를 설정하기
font_path = 'NanumGothic.ttf'


def get_tages(text):
    t = Twitter()
    nouns = t.nouns(text)
    count = Counter(nouns)
    return  count

def make_cloud_image(tags, file_name):
    # 만들고자 하는 워드클라우드의 기본설정을 진행하기
    word_clould = WordCloud(
        font_path=font_path,
        width=800,
        height=800,
        background_color="white"

    )
    word_clould = word_clould.generate_from_frequencies(tags)
    fig = plt.figure(figsize=(10,10))
    plt.imshow(word_clould)
    plt.axis("off")
    # 만들어진 이미지 객체를 파일 형태로 저장한다.
    fig.savefig("outputs/{0}.png".format(file_name))

def process_from_text(text):
    tags = get_tages(text)
    make_cloud_image(tags, "output")


@app.route("/process", methods=['GET', 'POST'])
def process():
    content = request.json
    words ={}
    if content['words'] is not None:
        for data in content['words'].values():
            words[data['word']] = data['weight']

    process_from_text(content['text'])


    return  jsonify(words)

if __name__ == '__main__':
    app.run('0.0.0.0', port=5000)


서버끊었다가 다시 재접속하고 나서
{
	"words": {
		"1": {
			"weight": "7",
			"word": "스터디"
		},
		"2": {
			"weight": "5",
			"word": "공부"
		},
        "text" :"안녕하세요"
	}
}
# 단어구름에 필요한 라이브러리를 불러옵니다.
from wordcloud import WordCloud
# 한국어 자연어 처리 라이브러리를 불러옵니다.
from konlpy.tag import Twitter
# 명사의 출현 빈도를 세는 라이브러리를 불러옵니다.
from collections import Counter
# 그래프 생성에 필요한 라이브러리를 불러옵니다.
import matplotlib.pyplot as plt
# Flask 웹 서버 구축에 필요한 라이브러리를 불러옵니다.
from flask import Flask, request, jsonify

# 플라스크 웹 서버 객체를 생성합니다.
app = Flask(__name__)

# 폰트 경로 설정
font_path = 'NanumGothic.ttf'


def get_tags(text, max_count, min_length):
    # 명사만 추출합니다.
    t = Twitter()
    nouns = t.nouns(text)
    processed = [n for n in nouns if len(n) >= min_length]
    # 모든 명사의 출현 빈도를 계산합니다.
    count = Counter(processed)
    result = {}
    # 출현 빈도가 높은 max_count 개의 명사만을 추출합니다.
    for n, c in count.most_common(max_count):
        result[n] = c
    # 추출된 단어가 하나도 없는 경우 '내용이 없습니다.'를 화면에 보여줍니다.
    if len(result) == 0:
        result["내용이 없습니다."] = 1
    return result


def make_cloud_image(tags, file_name):
    # 만들고자 하는 워드 클라우드의 기본 설정을 진행합니다.
    word_cloud = WordCloud(
        font_path=font_path,
        width=800,
        height=800,
        background_color="white",
    )
    # 추출된 단어 빈도수 목록을 이용해 워드 클라우드 객체를 초기화 합니다.
    word_cloud = word_cloud.generate_from_frequencies(tags)
    # 워드 클라우드를 이미지로 그립니다.
    fig = plt.figure(figsize=(10, 10))
    plt.imshow(word_cloud)
    plt.axis("off")
    # 만들어진 이미지 객체를 파일 형태로 저장합니다.
    fig.savefig("outputs/{0}.png".format(file_name))


def process_from_text(text, max_count, min_length, words):
    # 최대 max_count 개의 단어 및 등장 횟수를 추출합니다.
    tags = get_tags(text, max_count, min_length)
    # 단어 가중치를 적용합니다.
    for n, c in words.items():
        if n in tags:
            tags[n] = tags[n] * int(words[n])
    # 명사의 출현 빈도 정보를 통해 워드 클라우드 이미지를 생성합니다.
    make_cloud_image(tags, "output")


@app.route("/process", methods=['GET', 'POST'])
def process():
    content = request.json
    words = {}
    if content['words'] is not None:
        for data in content['words'].values():
            words[data['word']] = data['weight']
    process_from_text(content['text'], content['maxCount'], content['minLength'], words)
    result = {'result': True}
    return jsonify(result)


if __name__ == '__main__':
    app.run('0.0.0.0', port=5000)
서버 실행후
{
    "text": "하 진짜 이게 뭐라고 파이썬을 먼저 설치를 안해가지고 5시간동안 완전 뻘짓했자너 자바스크립트 망해라 망해라 망해라.",
    "maxCount": 15, // 최대 word cloud 에 등록될단어 15개
    "minLength": 2, // 글자 최소 2자리부터
    "words":  {"1":{"weight":"7","word":"스터디"},
    		    "2":{"weight":"5","word":"참여"},
                "3":{"weight":"5","word":"분노"},
                "4":{"weight":"4","word":"치킨"}
               }
}

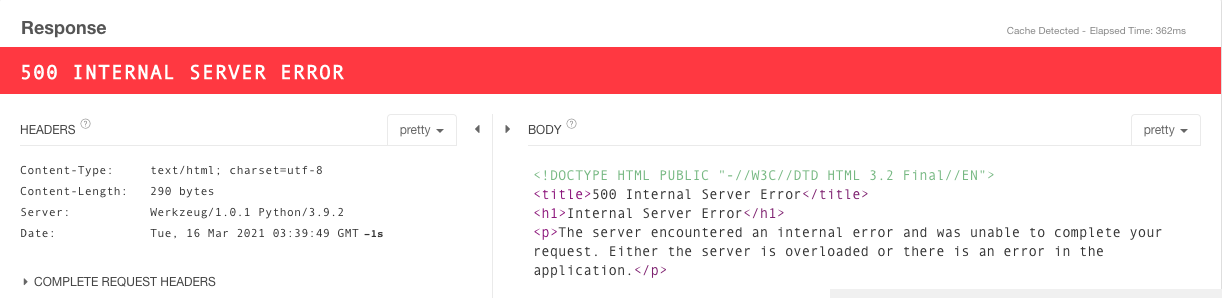
최종 코드 작성후 서버 재실행 -> response 네트워크통신 상태 ok 뜬거 확인 -> 미리생성했던 outputs 폴더에 png 이미지 파일 자동생성

파이참 OSError: [Errno 48] Address already in use 에러뜰때
somjang.tistory.com/entry/Python-OSError-Errno-48-Address-already-in-use-Flask
[Python] OSError: [Errno 48] Address already in use ( Flask )
Flask로 API를 만들던 중 (venv) (base) DongHyunui-MacBook-Pro:ElasticsearchAPI donghyunjang$ python3 app.py * Serving Flask app "app" (lazy loading) * Environment: production WARNING: This is a deve..
somjang.tistory.com
.gitignore 파일에
outputs
'React & Next.js' 카테고리의 다른 글
| React와 Firebase로 앱 개발하기 - 워드 클라우드 API 상세 수치 설정하기 (0) | 2021.03.16 |
|---|---|
| React와 Firebase로 앱 개발하기 - React와 Flask API 연동하기 ( (0) | 2021.03.16 |
| React와 Firebase로 앱 개발하기 - React 웹 폰트 적용하기 (0) | 2021.03.16 |
| React와 Firebase로 앱 개발하기 - 텍스트 파일 업로드 및 조회/삭제 구현 (0) | 2021.03.16 |
| React - Command failed with exit code 127 에러날때 (0) | 2021.03.15 |


